Thursday, May 29, 2008

New Spin on an Old Favorite

One of my favorite cookies to make is a raspberry tea cookie. I have tried to vary them before. I have substituted raspberry preserves for blueberry, strawberry, and blackberry. Raspberry has by far remained my favorite. After those trials I did not learn my lesson. I decided one more try with a new twist for this cookie. I have had a jar of guava jam in my cabinet for a while. I decided that it has been neglected long enough, I don't have a toaster, what can I do with it? Guava and cheese cookies! I made them in honor of the Cuban guava and cheese pastry. The one problem: pastry is lighter. The dense cookie along with the guava and cheese was not my favorite.


Despite this not working out as well as I had hoped, I still highly recommend the original recipe for black raspberry tea cookies.

Wednesday, April 23, 2008

Vegetarian Stuffed Mushrooms


During the week I like to try to cook with what I have in my fridge and cupboards. I usually have a decent amount of stuff to choose from, and love to try to make a dish out of what I think sounds good. I am usually making it for just myself, so if it doesn't turn out so well no one knows. My most recent attempt was stuffed mushrooms. I saw these ingredients in my kitchen; portobello mushrooms, jar of roasted red peppers, fresh spinach, zucchini, and cream cheese. I mixed those ingredients (either the amount that I had left or what looked like a good amount) with some bread crumbs and seasonings and baked them. Results: good, but not great... possibly too much cream cheese!

Thursday, April 10, 2008

Everything is better on a stick!


My mom had given me the idea of making antipasto on a stick for my next party. I always love the idea of turning regular food into finger food! I probably had too much fun making these... the entire time I was making them I could not stop thinking of the conversation from "There's Something About Mary" when they talk about how there should be more meat on sticks. I laughed to myself a little too much about it.
These were probably one of the easiest appetizers I have made in quite some time. Another good part about them is you can use very good ingredients or cheap ingredients depending on what you need them for.

Ingredients for Skewers:
Pepperoni
Salami
Grape Tomatoes
Roasted Red Peppers
Green Olives
Black Olives
Mozzarella Cheese

Cut the pepperoni, salami, and mozzarella (if needed) into chunks. Add one of each item onto a bamboo skewer, add extra if there is room left over. Arrange on a tray and drizzle with dressing.

Dressing:

1/2 cup red wine vinegar
3 tablespoons lemon juice
1 teaspoon honey
2 teaspoons salt
1 cup olive oil
Salt and freshly ground black pepper

I would recommend making this a little bit ahead of time so the vinaigrette has time to soak into the antipasto.

Wednesday, April 2, 2008

Coconut Not-So-High Hats


I could not be more excited about Martha Stewart's cupcake week! I am eager to try all of the recipes she has listed! I started out with the High Hats. After reading a few reviews, I decided to change the topping a little. Then while making it I decided to change it a little more and make it coconut flavored. I LOVE coconut and chocolate together!
The results were great! I did not pile the meringue as high as suggested and I am glad I didn't. I think the height I left mine at was the perfect amount of cake and topping.
One of the most difficult parts was the dipping process. I had quite a few "hats" fall off into the chocolate. Doing it very very quickly seemed to help with most, there were a few that had no hope!
I will definitely be making these again and again, they instantly became one of my favorites!

Recipe:

FOR THE BATTER
3 ounces unsweetened chocolate, chopped
1 cup all-purpose flour
1/2 teaspoon baking powder
1/2 teaspoon baking soda
1/4 teaspoon salt
1/2 cup (1 stick) unsalted butter, softened
1 1/4 cups sugar
2 large eggs
1 teaspoon vanilla extract
1/2 cup sour cream

Preheat oven to 350 degrees with rack in center. Prepare the batter: Place chocolate in a medium heatproof bowl, and set it over a medium saucepan of barely simmering water; stir chocolate until melted and smooth. Remove bowl from heat, and set aside to cool slightly.
Meanwhile, whisk together flour, baking powder, baking soda, and salt in a medium bowl; set aside.
In the bowl of an electric mixer fitted with the paddle attachment, cream butter and sugar on medium speed, scraping sides of bowl as needed, until light and fluffy. On low speed, mix in melted chocolate. Increase speed to medium, and add eggs, one at a time, mixing well after each addition. Add vanilla, and beat until mixture is creamy and color has lightened slightly, about 1 minute. Mix in sour cream. On low speed, add half of reserved flour mixture, beating until just incorporated. Mix in 1/2 cup water. Add remaining flour mixture, and mix until just incorporated.
Line a cupcake pan with paper liners. Fill each liner with enough batter to come 1/8 inch from top, about 1/3 cup. Bake, rotating pans halfway through, until tops are firm and a cake tester inserted in the center comes out clean, about 20 minutes. Transfer cupcakes to a wire rack to cool in pan for 10 minutes.
Use a small knife to loosen any tops stuck to the pan. Carefully invert cupcakes onto the wire rack. Turn cupcakes right side up, and let cool completely.

FILLING

1 3/4 cups sugar
1/4 cup water
3 large egg whites
1/4 teaspoon cream of tartar
1 teaspoon coconut extract

Put the sugar, water, egg whites, and cream of tartar in a heatproof container or the top of a double boiler (make sure there is room for the mixture to expand) and beat with a handheld electric mixer on high speed until foamy, about 1 minute. Put the bowl over, but not touching, a saucepan of barely simmering water (or the bottom of the double boiler).

The top container should sit firmly over the pan of hot water. Beat on high speed until the frosting forms a stiff peak, about 12 mintues. The frosting should register 160 degrees Fahrenheit on a thermometer. Remove the container from the water, add the coconut extract, and continue beating for 2 minutes. The filling will become firmer as it cools on the finished cupcakes.

Spoon the filling into a large pastry bag fitted with a large star tip . Leaving an edge on each cupcake, pipe the filling into mound on top of each one. Place the filled cupcakes on a platter and refrigerate, uncovered, while you prepare the coating.

CHOCOLATE COATING

2 cups (12 ounces) semisweet chocolate chips or chopped semisweet chocolate
3 tablespoons canola or vegetable oil

Put both ingredients into a microwave safe bowl and heat for about one minute, or until melted. Stir the mixture to make sure its smooth and thoroughly combined. After, dip the tops of each cupcake into the hot chocolate. Make sure to do this quickly, if not the "hats" will fall off. If you want to coat the tops completely you can always touch up with a spoon full of melted chocolate.

Place the cupcakes back onto the tray and refriderate until chocolate has cooled completely. These cupcakes should be served cold.

Monday, March 31, 2008

Finally, an excuse to make the Orange Jello Shots!


I was very excited to try the Orange Jello Shots that I posted about a few weeks ago. They were a huge hit! I used rum instead of vodka. Also, the picture from Food Network shows them sliced in long wedges. I tried this and could tell that they would not come out very well, so I opted to cut them into triangular pieces. These will definitely be something I will make again and again.

Captain and Lemonade


Captain Morgan Lemonade is one of my favorite cocktails to make for a party for two reasons: (1) Most people have never heard of such a thing (2) Even guys like it.

I tried to change the recipe up a little this time. Normally I mix Captain Morgan, lemonade and grenadine. This time I decided to try substituting the grenadine with raspberry liquer. It worked out very very well! The grenadine gives it a pretty pink color, but the raspberry liquer is not as sweet.

I don't have a set recipe for it. The amounts vary depending on who I am making it for. Generally it stays around this:

Recipe:

Fill a pitcher 1/3 up with Captain Morgan, add a splash of raspberry liquer, then fill the rest with lemonade.

Party Time!


I threw a party on Saturday for my football team. We celebrated finishing our season undefeated!
This was the first party I have thrown in a few years, so I was very very nervous, but it turned out to be a success! I spent the entire day Saturday cooking and baking. I was very nervouse because I chose to make a lot of things I have never made before. I ususally try not to do that, because my success rate is not always the highest, but I got lucky this time!

Thursday, March 27, 2008

Thank you Brittany!


For Christmas, my little sister gave me a painting she made just for me! I finally had time to hang it. I love it!

Wednesday, March 26, 2008

Where have I been???


I have been out of town for a week working at a golf tournament... I made that scoreboard!
This weekend I am planning a girls night out that starts at my house with cocktails and apetizers. I cannot wait to post what I made! I have missed my kitchen!

Thursday, March 6, 2008

Bread Baking and Beyond!


After my bagel making fiasco, I am dying to take another stab at some sort of bread making. After a little searching, I found a great site to help me along this time... The Fresh Loaf. It includes recipes, tips, links, and the yummiest pictures ever! There is a tutorial for getting started that I plan to try and hopefully master!

Tuesday, February 26, 2008

I couldn't agree more!

I am a big fan of cooking this way: If its healthy, keep it that way. If its not, don't try to change it. I hate when people look at one of my MINI cupcakes and talk about it ruining their diet. No one could have said all of this better than Bronwen Weber:

Recently someone asked us to create a low cal/low fat cupcake. I had to draw the line...... Here is my response.

My cupcakes are healthy. (I can justify anything, just wait) A cupcake (as delectable as our chocolate caramel cashew variety) is healthy….on occasion…on special occasion. I am in the business of special occasions, or rather, making occasions special: so to make a cupcake that is low fat (read yucky) would hurt our business. It would only bring attention to the fat content of real cupcakes. Cupcakes are not breakfast food, nor should they come out for a dinner plate, but they do have their place in our lives. We live for celebrations. We count down the moments to our next one. This is where cupcakes belong. Do not blame the cupcake for being delicious- blame the consumer for being too eager to add the cupcake to our daily menu and remove the celebration and luxuriousness from our frosted little friend.


Perhaps it is an unnecessary rant. But....I sure did feel better afterwards. I almost felt good enough to celebrate....with a delicious cupcake.


Reason #975398437 why she is awesome!

Monday, February 25, 2008

The Bagels Are Bad!


I decided to try making bagels. I never have before, and thought it would be fun to try... Fun? Yes. But they came out awful! After retracing my steps and trying to determine where I went wrong, I realized I think the water that was mixed with the yeast was probably too hot. They looked cute, and were fun to make, but it ends there.
I would say that my favorite part of this was trying to think up new bagel flavors. For about two weeks prior to making them I asked people "If you were to make up a new bagel flavor, what would it be?" I got some very interesting replies.In the end I decided to create bagels with a hint of citrus. The flavors were : Lemon Pepper, Lime and Chili, and Orange Curry. I only tried them out on one bagel each, and topped the rest of the bagels with sea salt and coarsely ground pepper.

Wednesday, February 20, 2008

Awesomely Orange!


I just stumbled upon How About Orange's blog and LOVE it! I have definitely found some fun ideas to try. My favorite by far it the Jello filled orange wedges. I always want to make jello shots to bring to a party, but have a hard time finding good containers to put them in. This idea is much cuter anyways!
The recipe and instructions are on Food Network.

Trixie Delicious


I have loved Trixie Delicious' "Vandalized Vintage" plates ever since I saw them on Oh Joy about a year ago. When we decided to decorate a wall in our dining room with vintage (and vintage inspired) plates, I knew we had to add one of hers to our collection. It adds humor and you can see who is really paying attention to the decor!
Although, it will definitely have to be taken down when Grandma comes to visit!

Tuesday, February 19, 2008

Room Inspiration!


Lately, my roommate and I have been working hard to make our apartment more homey and personal. This weekend we decided to decorate our dining room. We chose to paint it bright pink! I was very nervous about painting a small room a bold color, but we both love it! I used this picture as inspiration and insurance that a bright pink room can be a very cool idea!

Monday, February 11, 2008

If you like pina coladas...


I went to a fish fry yesterday and decided to make pina colada cupcakes to bring. I have never made anything like them before, but I knew I had all of the ingredients at home and wouldn't need to run to the store. I used a yellow cake recipe and topped each cake with crushed pineapple before baking them. Then I poked holes in each cake and poured spoonful of a rum, butter and brown sugar mixture in each. Finally, I topped each with coconut flavored icing. I wound up not liking how much icing was on each cupcake. It took away from the other flavors. I scraped off about half of the icing, but did not take pictures.

Yellow Cake:
6 large egg yolks
1 cup milk
2 teaspoons vanilla extract
3 cups sifted cake flour
1 1/2 cups granulated sugar
1 tablespoon + 1 teaspoon baking powder
3/4 teaspoon salt
12 tablespoons unsalted butter, room temperature and cut into pieces
1 can of crushed pineapple

In a medium bowl lightly combine the egg yolks, 1/4 cup milk, and vanilla extract.

In a large bowl sift together dry ingredients. Add the butter and remaining 3/4 cup milk. Mix on low speed until the dry ingredients are moistened. Increase the mixer speed to medium and beat for about 2 minutes. Gradually add the egg mixture, in 3 additions, beating about 30 seconds after each addition to incorporate the egg.

Fill each cupcake paper about half way. Then add a little bit of crushed pineapple. Try to keep the pineapple in the center of the cupcake. Bake at 350 for about 15 minutes (if making mini cupcakes).


While the cupcakes were baking, I made the butter sugar mixture that I added to rum. The mix I made was WAY too much, but I am saving and will make a cake with it soon! I used one stick of butter and about 1/2 cup of brown sugar and 1 tsp of cinnamon. First I let the butter melt, then added the sugar and cinnamon. Once all of the ingredients were combined, I removed the pan fromt eh heat and let it cool a little. Then I added 1 cup of light rum and 1 cup of dark rum. Then mixed them well. I will definitely be making this again and when I do I will cut all of the rum mixture ingredients by at least half.

Coconut Icing:

3 cups confectioners' sugar
1 cup butter
2 tablespoons coconut extract
1 to 2 tablespoons whipping cream

This has definitely become one of my favorite recipes. I may change a few things and use fresh pineapple or use toasted coconut in the icing next time, but for this occasion I was making what I had work. The two plates I brought over were gone in about an hour!

Wednesday, February 6, 2008

Tiramisu Cupcakes


I found a recipe for tiramisu cupcakes on Flickr a few months ago. They have been at the top of my list of things I am dying to make since! This weekend my mom and I made them together. They surpassed my expectations! This recipe will definitely be one I keep and make again and again.


I made a few very very small changes and clarifications to the recipe:

Sponge Cake:

6 eggs, separated (separate when cold; allow to come to room temp)
3/4 teaspoon cream of tartar
1 cup sugar, divided
3 tablespoon water, room temp
1 teaspoon vanilla
1/8 teaspoon salt
1 cup sifted, all-purpose flour (measure after sifted)
In large mixing bowl at high speed, beat egg whites with cream of tartar until foamy. Add half of the sugar, 2 tablespoons at a time, beating constantly until sugar is dissolved and whites are glossy and stand in soft peaks. Rub just a bit of meringue between thumb and forefinger to feel if sugar has dissolved.
In small mixing bowl at high speed, beat egg yolks until thick and lemon-colored, about 3 to 5 minutes. Gradually beat in remaining sugar, water, vanilla and salt (if desired) untilblended.
To add remaining ingredients sift in flour on top of the whites (do not mix or fold yet!) then fold in egg yolk mixture combining flour and yolk mix to the whites at the same time. Make sure everything is thoroughly combined. Fill muffin cups 2/3 full.
Bake in a preheated oven at 350 degrees for 10-15 min or until done.

Espresso Syrup

½ cup confectioner’s sugar
2/3 cup water
5 teaspoons espresso powder or 7 teaspoons of instant coffee

In a small, heavy saucepan over high heat, combine the water, the remaining 1/2 cup confectioner’s sugar and the espresso or coffee powder. Bring to a boil, stirring occasionally. Remove from heat and let cool.
Use a fork or toothpick to poke a few holes into cupcakes so that they will absorb liquid. Pour approximately ½-1 teaspoon of syrup onto each cupcake.

Frosting

3 c mascarpone
1 c confectioner’s sugar
¼ c marsala wine
¾ c heavy cream, chilled

In a medium bowl using an electric mixer set on medium speed, beat together the mascarpone cheese, confectioner’s sugar and marsala until well blended. Add the cream and beat until fluffy, about 1 minute. Frost cupcakes with mascarpone/whipped cream mixture. Dust tops with cocoa powder (I used unsweetened) and then sprinkle with dark chocolate shavings.

Monday, February 4, 2008

Paul & Joe


A few days ago Oh Joy, one of my favorite bloggers, posted about Paul & Joe wall papers and screen savers. I immediately downloaded the screen saver on my work and home computers. I love it! I do not have a clock in my room (where my computer is) so its great to have one around.

Friday, February 1, 2008

This always makes me happy...

"I love that you get cold when it's 71 degrees out. I love that it takes you an hour and a half to order a sandwich. I love that you get a little crinkle in your nose when you're looking at me like I'm nuts. I love that after I spend day with you, I can still smell your perfume on my clothes. And I love that you are the last person I want to talk to before I go to sleep at night. And it's not because I'm lonely, and it's not because it's New Year's Eve. I came here tonight because when you realize you want to spend the rest of your life with somebody, you want the rest of your life to start as soon as possible." -- Billy Crystal, When Harry Met Sally

Wednesday, January 30, 2008

Chocolate coverd strawberries instead of flowers!


I LOVE to make strawberry bouquets for people for special occasions! They are so fun to make (regular chocolate, I have given up on white chocolate) and they are definitely something that will stand out from other gifts! For some I have tried to get creative with decorating the strawberries with sliced almonds or chocolate chips. The only down side if this project/gift is transporting it. I would definitely recommend delivering it with a friend who is willing to drive or hold onto it. If that is not possible, I did take one on a 4.5 hour car ride by tightly securing it in a foam cooler with some strategically placed bamboo skewers!

To make:
Use a double boiler or a bowl (that can handle high temperatures) over a pan of boiling water. Melt the chocolate in the bowl. I would not recommend adding anything to the chocolate that would water it down. Then place a strawberry on a bamboo skewer and dip it in the chocolate. I make sure I have a cup or vase in the freezer waiting, and then I put the chocolate covered strawberry into the freezer. I keep repeating this until the cup or vase I am using is full. I take that one out and put it in the fridge and get a new cup ready. I continue this until I run out of strawberries or chocolate (whichever comes first).
I have made the vase/basket a few ways. For most I have used a basket from the craft store that I filled with floral foam and covered with moss. The last time I decided to make a strawberry bouquet, I used a pitcher and filled it with M&Ms. Both work great!
These are all bouquets that I have made over the years. I wanted to wait to post about them after I have made another, but I decided it would be a great idea to share them now. They would make a great gift idea for Valentines Day, or a fun centerpiece for a V-day party! The next time I do this I will have to take more pictures and post a step-by-step guide. I haven't made another since I became a blogger!

Tuesday, January 29, 2008

Recycled and FABULOUS!


I came across these beautiful stools today. They are made by a skate boarder in Japan. The site is called core (Composed Of Real Elements). Core contains quite a few products made from recycled (retired) skateboards. Most of the other stuff on the site is jewelery, and these stools are by far my favorite!

Sunday, January 27, 2008

The rug gets some color!


After some consideration, I decided to add color to the rug I am making for my living room. I love the idea of a super plush white shag rug, but I keep fearing that it will get dirty too quickly. I am spending a lot of time on it and the last thing I want is to be afraid to walk on it. As of right now, I might keep the white band at one side. If I get sick of it I can slowly add color into that portion. Even my dog Bonnie gave the change her seal of approval!

Bicycle


I wish I could afford the Cynthia Rowley beach cruiser. They are adorable! They could be a fun inspirtaion for a revamp of an old bike. Hmmmmm....

Wednesday, January 23, 2008

Bueller...


I ordered a few prints from Bueller on Etsy. Yesterday, I finally got them in the mail, and I LOVE them! This girl definitely knows how to photograph the beach (among many other things)! I cannot wait to hang these. I am currently debating between a straight grid or mismatched frames in an unplanned grouping.

Monday, January 21, 2008

Snowball Cupcakes


I decided to try to make a snowball cupcake modeled after the Hostess Snowball Snack cakes. Not only did they turn out adorable, they are delicious too! I cannot wait to share them at work tomorrow!

Chocolate Cake Recipe:
1 3/4 cups all purpose flour
2 cups sugar
3/4 cup unsweetened cocoa
1 1/2 teaspoon baking soda
1 1/2 teaspoons baking powder
1 teaspoon salt
2 eggs
1 cup milk
1/2 cup vegetable oil
1 teaspoon vanilla
1 cup boiling water

Preheat oven to 350 degrees. In a large bowl combine flour, sugar, cocoa, baking soda, baking powder and salt. Mix together with a fork then set aside. In small bowl combine eggs, milk, oil and vanilla. Beat well with hand mixer. Slowly add boiling water to wet ingredients. Add wet ingredients to flour mixture and fold and stir until smooth. Pour batter into papers. I made minis, and filled the papers about 2/3 full. Bake for 15 minutes. Remove cupcakes from pans and cool on racks.

Vanilla Buttercream Frosting Recipe:
3 cups confectioners' sugar
1 cup butter
1 teaspoon vanilla extract
1 to 2 tablespoons whipping cream

With a mixer, mix together sugar and butter. Mix on low speed until well blended and then increase speed to medium and beat for another 3 minutes.
Add vanilla and cream and continue to beat on medium speed for 1 minute more, adding more cream if needed for spreading consistency.

Tinted Coconut:
1 bag coconut
food coloring of choice
1/2 cup confectioners' sugar (optional)

Put the coconut into a large mixing bowl. Add a few drops (2 or 3) of food coloring at a time and stir around with a fork. Continue to add food coloring until coconut is the desired color. Mix in confectioners' suger for extra sweetness.

Cheese Louise!


I have been eyeing Cheese Louise for a while now on Chiasso. She looks so fun. I am not usually a sucker for cutesy decor, but there is something aobut her I love! I think its her name... I was about to buy her when I noticed that she has gotten a bad review. It reads:

Dangerous Fun
This is a whimsical addition to any countertop. It is well constructed and works very well...a little too well. The problem I have with it is that the curved design makes it pedifficult to use without grating your knuckles. I have worked in kitchens for many years and have never hurt myself more than since I have owned this product.


Perhaps if I bought this it would be for decorative purposes only!

Thursday, January 17, 2008

Pretty Cupcakes!


While browsing Flickr, I came across Kylie Kambert's cupcakes. This woman is amazing! Her cupcakes are beautiful! The skill shown in her cupcakes photoset is something I definitely envy. She also has a great set with photos of very pretty and creative packaging.

Monday, January 14, 2008

Cheesecake Cookie Dip


I am not a huge fan of cheesecake, but the other day I was having a serious craving. I have been trying to watch what I eat, and watch what I spend so buying a cheesecake was out of the question! I have seen that cheesecake filling sold next to tthe cream cheese at the grocery store. I looked at the fat content and put it right back, 20 grams per serving! I bought a block of low fat cream cheese and decided to work with what ever else I had at home. This is what I cam up with:

1 8 oz package cream cheese
1/2 cup whipped cream
2 tbsp sour cream
1/4 cup sugar
1 tsp lemon juice

I used lowfat products and half sugar, half Splenda. The result was great! I dipped vanilla wafers in it. I will definitely be making this dip for my next party!

Ebay find gets a makeover!


I bought this stool on Ebay for $3.25 to go in my kitchen. My roommate painted the legs and covered it with a dishtowel from Target. It fits with the rest of the kitchen perfectly now! Thanks Erin!

Thursday, January 10, 2008

Foam Heart


My sister made this with the foam of her beer.

DIY Cupcake Stand


I wish I had found this back in October. I made the dessert table for Rotaract's Endless Summer Ball and was desperate for something like this. These are so cute and you can create one to match any occasion!

CakeJournal.com: How to make a cake stand for cupcakes or mini cakes

Wednesday, January 9, 2008

Obsessed with Etsy!

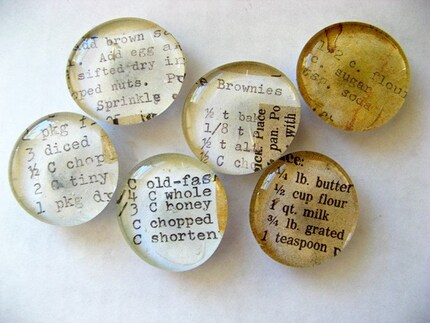
My wishlist on Etsy is huge, and grows bigger every day. These magnets are the newest addition to my wishlist!


Recipe Magnets

Tuesday, January 8, 2008

DIY Shag Rug


I always have some sort of craft project that I am working on. My latest one was also my inspiration for creating this site. I am making a rug for my living room! For months now, I have loved the idea of putting a shag rug in my living room. After a considerable amount of searching, I did not find anything that I was happy with and was also in my price range.
I took a trip to the craft store and picked up rug making net, a latch hook, and some white ponte. I chose the stretchy ponte because it looked like it would be durable and hold up to stains well. Also, it does not curl the way jersey does.
I cut the fabric into strips about a half inch thick and five inches long. After several attempts, I tossed the latch hook. The strips were too thick. I started looping the strips through by hand. It was hard at first, but after quite a few I got the hang of it.
I started noticing that my rug was too thick. I did not think that was possible. To thin it out a little I started a pattern. I would hook through two full rows, and on the third row I would skip three squares.
I am sure I will make a few more mistakes and find a few more tricks along the way.
There will definitely be more pictures of my rug and its progress posted very soon. This is my biggest DIY project ever and is surely going to take forever to finish!